Introduction
One of the most exciting frameworks released with iOS 11 is ARKit. With ARKit you can incorporate 3D data and objects into the physical environment of the user. Moreover, objects can be interactive, offering a richer experience of the real world. Technologies like virtual reality and augmented reality are not that new, however, with smartphones becoming more powerful, there are fewer limits to what is possible. That includes improved cameras, better processors and a larger variety of sensor data. The new iPhones’ cameras offer a perception of 9 levels of depth and combined with powerful processors, making it possible to create rich and immersive worlds.
Understanding ARKit
ARKit offers you a high-level interface with powerful features. It’s supported on all devices with an A9 (or higher) processor. It includes three key features: Tracking, Scene Understanding and Rendering.
Tracking enables us to track the phone in real-time and determine its position in the physical environment. It combines motion data, camera images and visual inertial odometry to determine where the device is, as well as its orientation.
Scene understanding helps us understand the environment around the device, providing attributes, properties and plane detection. To place objects onto planes, hit testing is being used. This is done by getting an intersection with the real-world topology. With light estimation, the object can be rendered to match the lightning of its surrounding.
The third ARKit feature is rendering. Data from images and sensors on the device can be provided as input in any renderer. For rendering with SceneKit and SpriteKit special ARViews are provided. Also, there is a Metal template for doing custom rendering.
In addition to processing, ARKit also handles the capturing that is done in order to support augmented reality. To accomplish this, it relies on AVFoundation for image data and CoreMotion for motion and positioning from device sensors.
The framework follows the concept of sessions, using ARSession to control the processing. To begin with ARKit, an ARSession is created with an ARConfiguration provided. With the session configuration, you can choose the kind of tracking you want to use. There are three supported configurations. ARWorldTrackingConfiguration enables six degrees of freedom tracking and it tracks device orientation, relative position, and scene information. AROrientationTrackingConfiguration is a simpler configuration and it allows three degrees of tracking freedom. Both of these use the rear camera of the phone. ARFaceTrackingConfiguration on the other hand uses the front camera of the phone. It is used to track the movement and expression of the face of the user. Besides the properties set by the configuration classes, additional properties can be set from the configuration classes and the ARSession class. Older devices might not support some features, so the configuration classes support checks whether the feature is available on the particular device.
The ARSession combined with the configuration starts the session with the run method. A session can also be run again with other configurations. Inside the session class we can access processed frames. Frames are of type ARFrame. ARFrame contains a captured image, detailed tracking, and scene information which includes the current tracking points and lighting conditions. You can pull the last processed frame or you can set a delegate to receive updates for every new frame. The scene information is related to the real-world tracking and is represented in feature points. They give us details like depth information, and make special-awareness possible. Additionally, there are ARAnchors. An ARAnchor is a position and orientation in real-world space. They can be added or removed from the scene, and they basically represent a virtual content anchored in the real world. They maintain the orientation and positioning of the object as the camera is moved.
Tracking
ARKit uses virtual inertial odometry to determine the position of the phone in the physical space. Using motion data from sensors and images captured from the devices camera, it constantly updates the project’s transform, or the projection matrix that is being used to render the content in adequate perspective and the right scale. All the positions are also relative to the starting position. Additionally, 3D feature points are created from the scene, which are later triangulated.
All this data is combined and an ARFrame is returned. Every ARFrame also comes with an ARCamera that represents the virtual camera. It represents the camera location and position. It provides a Transform – a 4X4 float matrix, containing information of the orientation, as well as translation of the physical device since the beginning of the session. In addition, a tracking state is also provided. The state can change over time, and there are camera intrinsics. They match the physical camera of the device and help with the rendering of the virtual geometry.
To get the best results, a static, feature rich environment is best, along with uninterrupted sensor data.
Scene Understanding
ARKit uses hit testing to create a topology of the scene, plane detection and light understanding to properly render objects. The process of hit testing involves sending a ray from the device camera and then intersecting it. This provides us with an array of 3D coordinates on which you can place an object. Planes are detected horizontally with respect to gravity. They are returned as ARPlaneAnchor. As the device moves, if more planes are detected, they will be merged together to form a larger plane. There are two types of hit testing. The first one takes into account the planes extent and will always intersect, and the other will not. In addition to this, lightning is being estimated from the captured images. This feature is enabled by default. The results of light estimation are provided to you in the Light Estimate property on the ARFrame as its ambient intensity value.
Rendering
Objects can be rendered with SceneKit, SpriteKit and Metal. SceneKit and SpriteKit are high level APIs, while Metal is a lower level API. Additionally, while SceneKit and Metal can work with 3D, SpriteKit is only for 2D objects. For each framework, there are dedicated ARView classes to handle ARFrames as well as delegate classes and protocols. All the elements from ARKit are represented inside the rendering environment and they are automatically added. That includes mapping ARNodes as well. For SceneKit, the developer can make use of ARSCNView, provided with updates for the SCNCamera, the lightning and mapping of SCNNodes to ARAnchors. Additionally, there are delegate methods if we want to provide our own node or if we want to be notified whenever a node is being updated or removed.
On SpriteKit there is ARSKView and mostly all of the same things are possible as with SceneKit. The difference is that SceneKit is a 2D engine. So, what happens here is that the ARAnchor positions are being projected into SpriteKit view and are rendered as billboards. With Metal, there are a few more steps that have to be executed. You have to draw the camera image, update the virtual camera, update the lightning and if you want to place objects, you use the ARAnchors to satisfy transforms. You can get the latest frame from the session, or the didUpdate method when a new frame is received. After that, simply update the rendering.
Sample project
To demonstrate the capabilities of ARKit we are going to make a simple project. For our rendering engine, we are going to use SceneKit. Remember that in order to execute the app you’ll need a device that has the A9 chip inside.
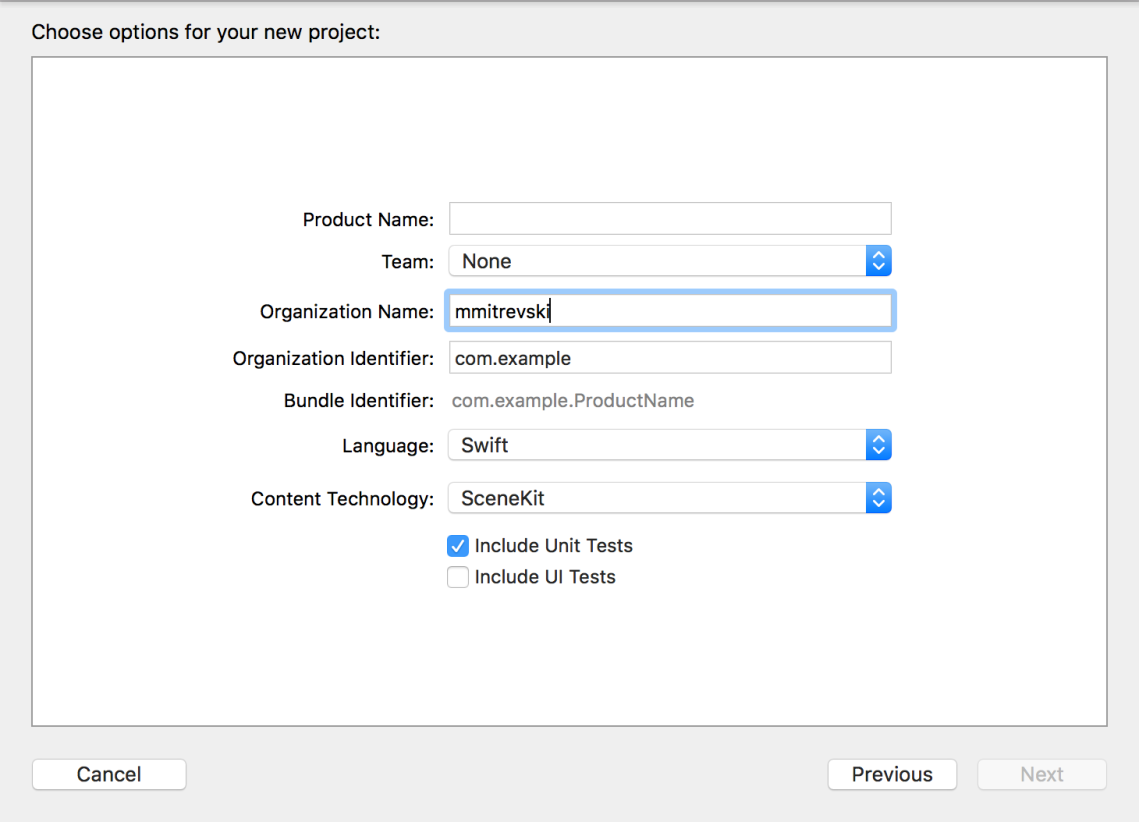
First, we need to open Xcode and create our project. With Xcode 9 there is already a template for creating an augmented reality app. Select the Augmented Reality app project template and on the next screen remember to select SceneKit under content technology.

If you run the app on a device immediately you’ll see a small airplane floating right before the view of the camera. Inside the project, we are already given textures for the airplane located in the a scnassets folder. Since this is an introductory project we won’t be using any advanced 3D modeling. Instead we’ll be using simple geometries already available with SceneKit. So, you can remove the folder with the airplane or leave it in the project if you want. We won’t be changing the storyboard. Inside the view controller there is already an instance of one of the view classes that we mentioned above. Since we use SceneKit, that is ARSCNView.
Now let’s see what’s inside the controller. We can see that it conforms to ARSCNViewDelegate. We need the ARSCNViewDelegate so we can make use of all the callback methods. We already have an instance of our ARSCNView and we set the current class as our delegate. Also in the ViewController we can see that some of the methods from the ARCNViewDelegate are already implemented. The methods related to the session can be used to notify the user when ARKit is finished initializing or when there is a problem or failure. All the other methods are called when there is a change in the environment related to ARKit, like adding new nodes or anchors. For now, we’ll leave them as they are. Just before the view is loaded we create the configuration we’ll use in our tracking session. We’ll also use ARWorldTrackingConfiguration. Then we just start the session with the chosen configuration using the run function. Then when the view is loaded, the scene is created and assigned to the session.
We’ll remove the created session and create a plain session. Also, we’ll enable some debug options on the scene view.
 Show feature points will help us understand better how the world tracking works, and the world origin will give us some orientation when placing objects, and how that changes during the use of the app.
Next, we’ll create a simple function that just creates a green box. I’ll call this function add box, and I’ll call it when the view loads.
We first create a simple geometry, in this case a box. The values for the size of the geometry are all expressed in meters, so here we have a box with a side of 10 cm, and a chamfer radius of 1 cm. To color the box, we access its materials and give the outside material a color of green. Then we move on to create the node that will be our box. Last, we just add the node to the scene. If you run the app you’ll see the box positioned right in front of the camera. If you move around you’ll see the box standing in one place. Now we’ll move the box just a bit further from the camera by giving the Z axis a negative value.

The world alignment in ARKit can be confusing, so feel free to experiment with different values just to get used to it.
The box now looks very static. To make it more realistic we are going to enable automatic light estimation and updating. We do this on the scene view.

Now if you move around you’ll see the box changing color and shade based on the lightening. And if you see the bottom you’ll see that it is dark.
To make it even more realistic, we are going to enable plane detection and we’ll add physics to our boxes. Plane detection is set in the configuration.
 To demonstrate that a plane is detected, we are going create a plane node with grey color and some opacity. To achieve this, we will use the didAddNode methods and didUpdate node method. First, we’ll create the plane node in didAddNode. Then we’ll just update its size when new planes are detected and merged.


Now let’s add gestures. We’ll add a tapping gesture to add boxes on every touch of the scene view.

When the user has tapped, we’ll do a hit test on the location of the tap to try and find existing planes. We’ll modify the add box function to receive a list of ARHitTestResult objects. If the list is not empty, we’ll take first one which is the one closest. The result is actually a transform matrix of all the points where an intersection has appeared. It holds rotation, position and scale properties.


Right now, our objects don’t have any physics. We can add this by accessing the physicsBody property of SCNNode and creating a SCNPhysicsBody object of type dynamic with a nil for shape. A dynamic type will react to interactions from its environment. We’ll also add mass value and a collision matrix. To demonstrate the physics, we’ll place the box just above where the user tapped.

Now, our boxes seem to be cutting and falling through the plane. That’s because the plane has no physics yet. Let’s fix that.

We’ll also create a physical body for the plane node, and then simply reinitialize it when the size changes in the didUpdate method.
Demo
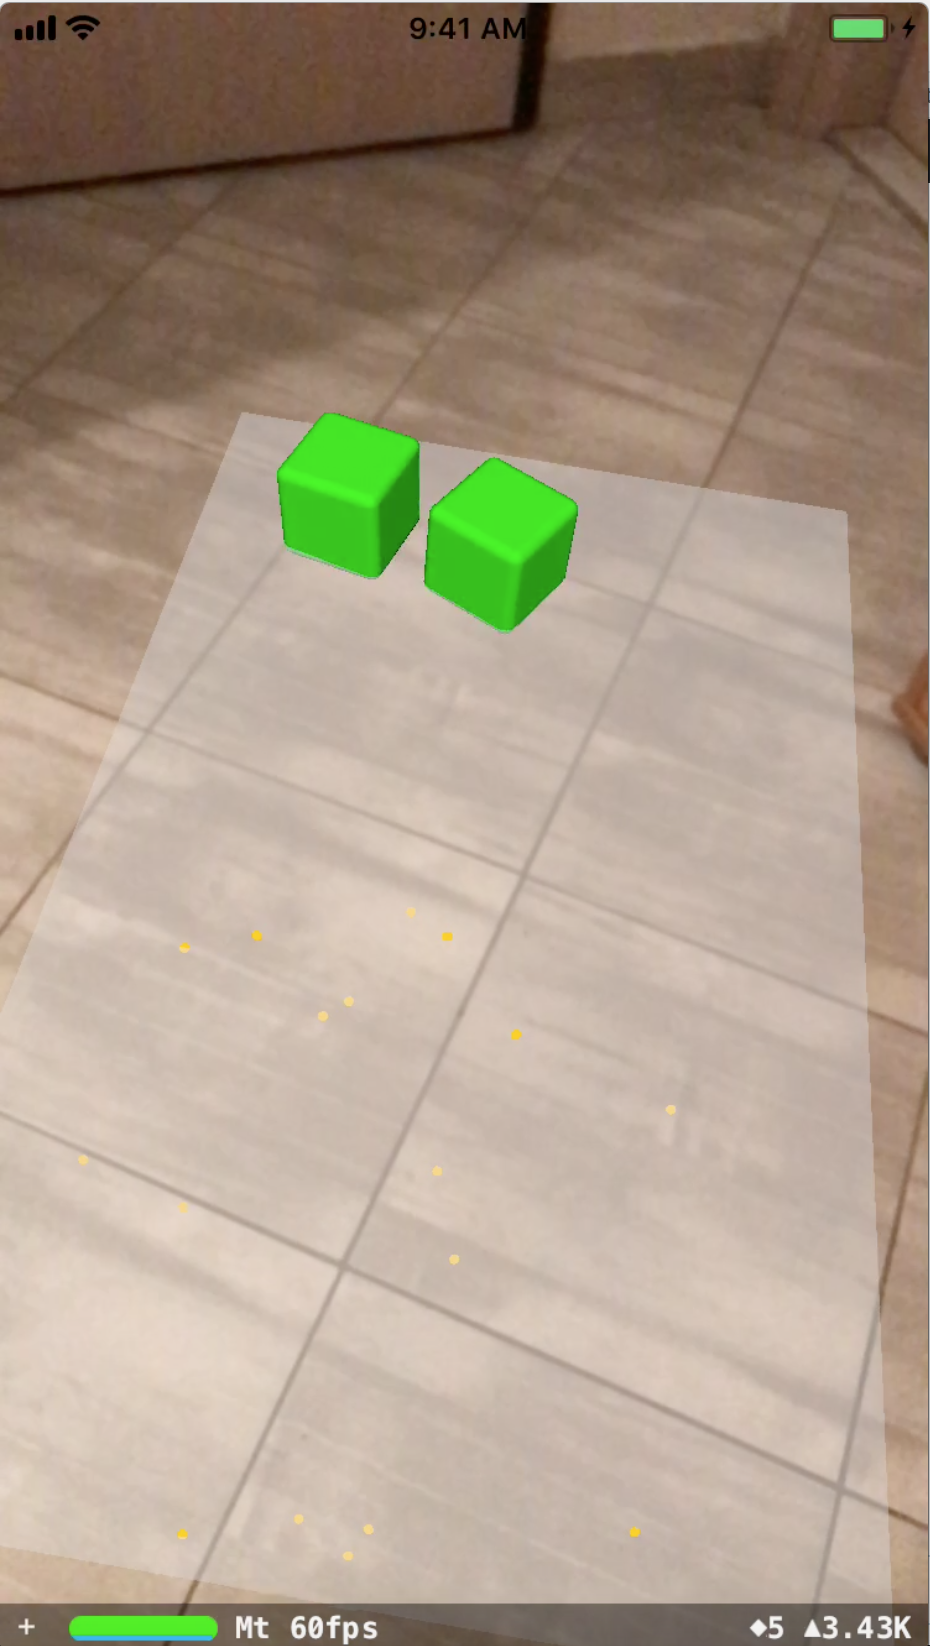
Run the app from the example project, wait until the world origin is loaded and then try to detect a horizontal plane. Tap on the screen and you will see boxes falling to the surface.
Conclusion
ARKit opens up a lot of possibilities for developers to create innovative apps. The best thing about augmented/mixed reality is that it’s not limited to gaming – it can have applicability in real business cases. For example, check AugmentIT, website from my company Netcetera, that has very cool use-cases developed for Microsoft’s Hololens. On Youtube, there are also some great videos that give a glimpse of the possibilities of augmented reality.
You can find the source code for the project here.

2 Comments