Introduction
In this post, we will build a drawing app with SwiftUI. Apart from being super fun and addictive, SwiftUI with its declarative approach, makes it a lot easier and clearer to reason about the state and updates that are happening in our apps. A drawing app is a good example of this – you have multiple sources of state. For example, you need to keep track what the user has already drawn on screen. Then, you need to provide drawing controls, that should customise the drawing such as pencil size and color. A good drawing app should also have a way to revert to a previous state with an undo functionality. Or when we are not happy with our drawing at all, to start from scratch.
Handling all the complexities mentioned above can be challenging in a UIKit based app. Let’s see how we can build a simple drawing app with SwiftUI.
Note: The implementation in this post was not the one that I used for my app Drawland.
Implementation
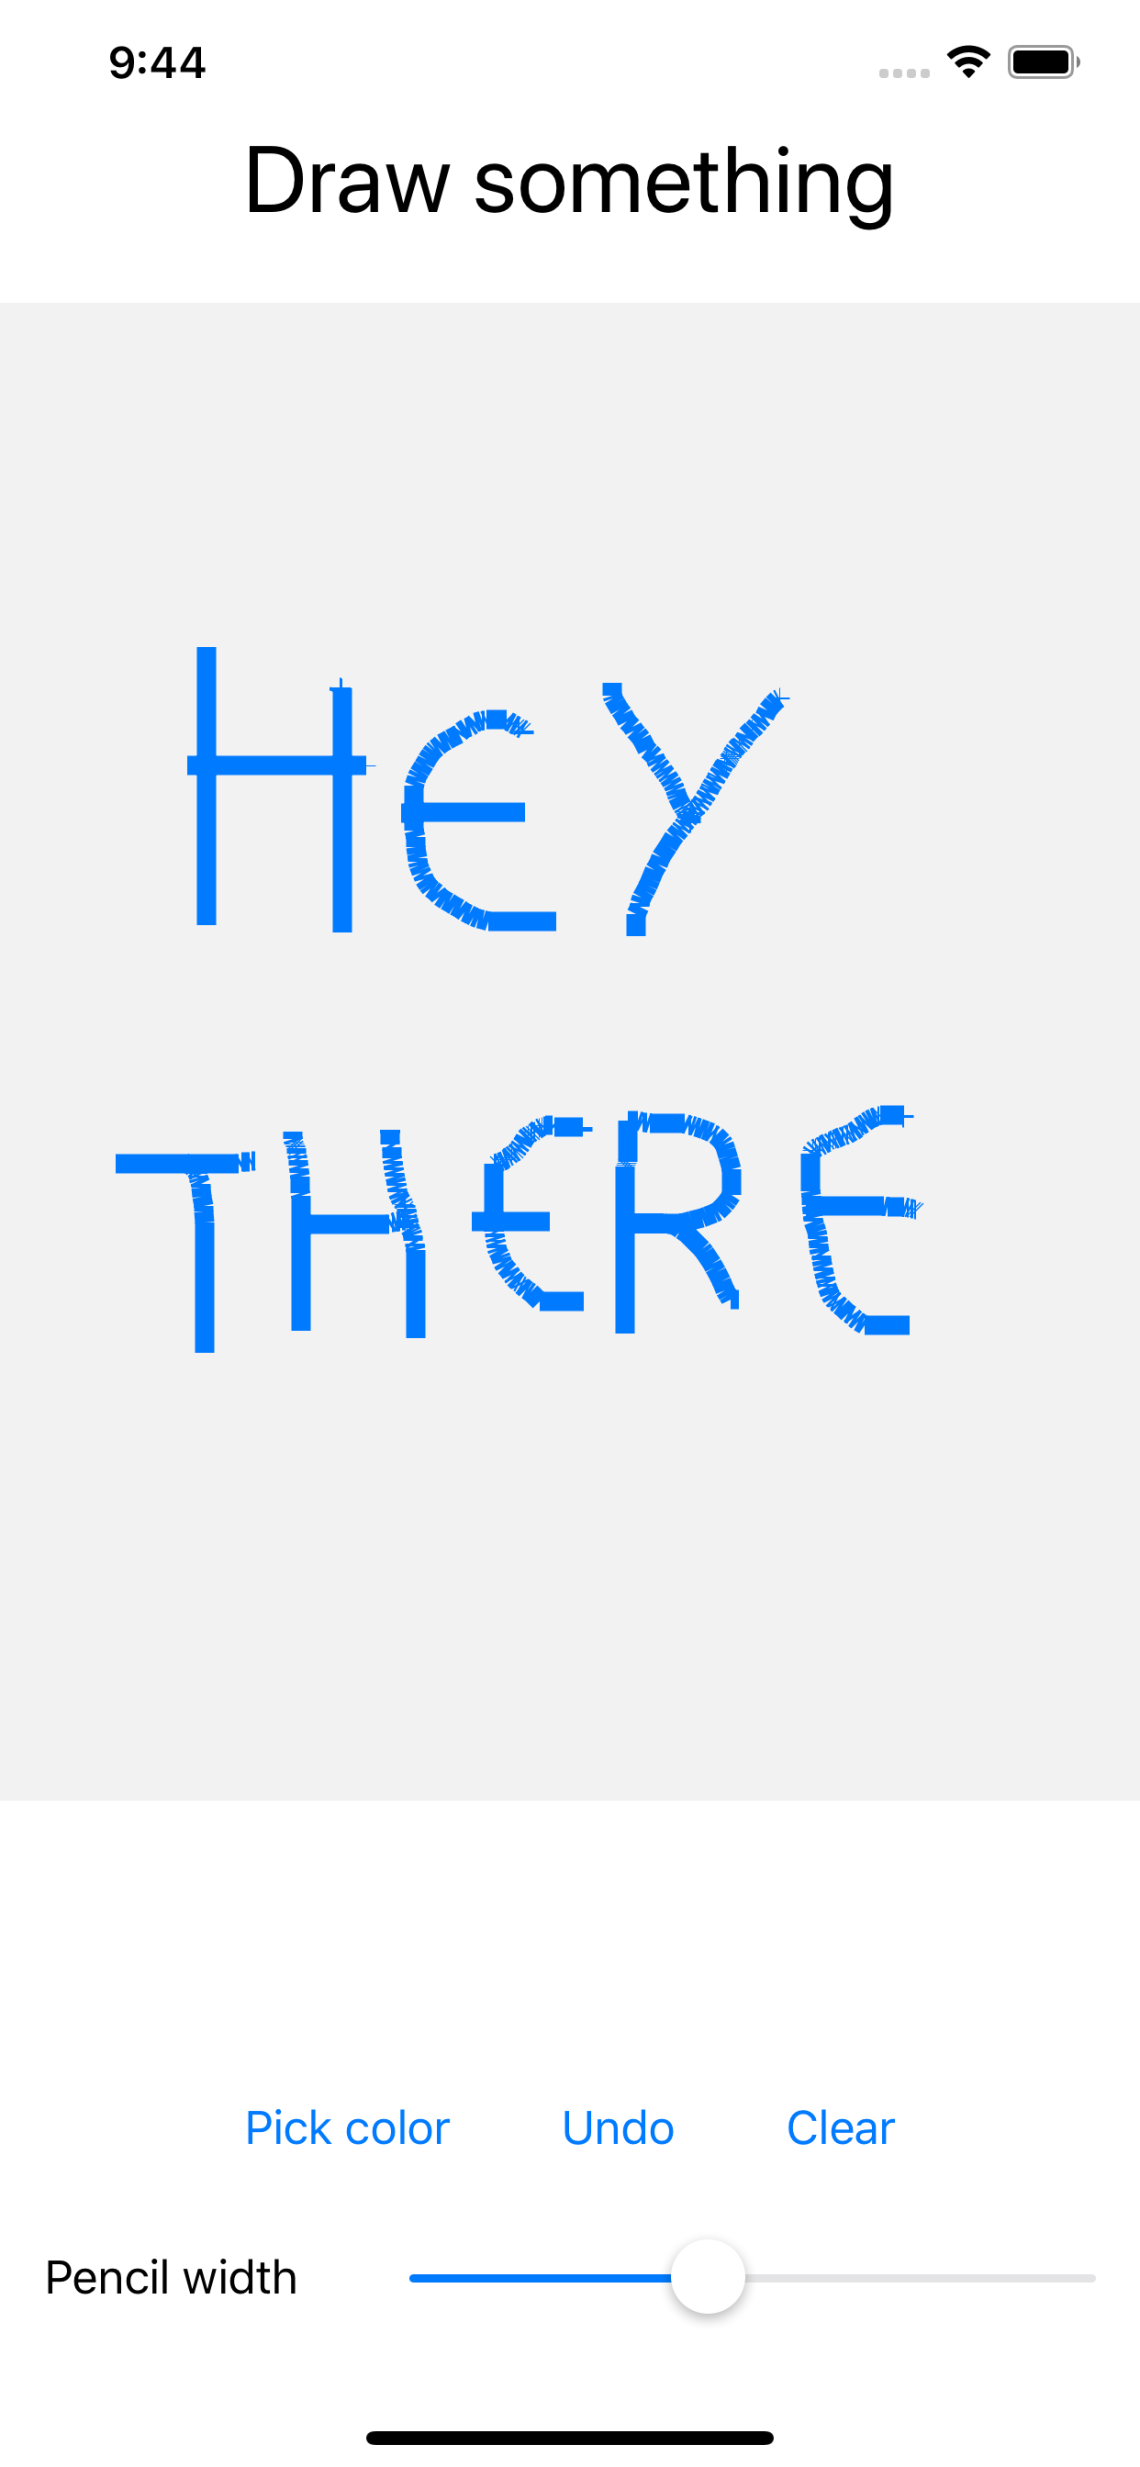
Let’s create a new Xcode 11 / iOS 13 project, called DrawingPadSwiftUI. The content view, which will open up when the users are first starting the app, will consist of a title (Text view), and two custom views DrawingPad (where we will draw our masterpieces) and DrawingControls (where we will customise the drawing with color, line width and undo functionality).
Translating this to SwiftUI code is pretty straightforward.
    var body: some View {
        VStack(alignment: .center) {
            Text("Draw something")
                .font(.largeTitle)
            DrawingPad(currentDrawing: $currentDrawing,
                       drawings: $drawings,
                       color: $color,
                       lineWidth: $lineWidth)
            DrawingControls(color: $color, drawings: $drawings, lineWidth: $lineWidth)
        }
    }
Now let’s have a look at the state that is passed to these views, and what that state represents.
    @State private var currentDrawing: Drawing = Drawing()
    @State private var drawings: [Drawing] = [Drawing]()
    @State private var color: Color = Color.black
    @State private var lineWidth: CGFloat = 3.0
The currentDrawing variable represents what the user is currently drawing on the screen. We need this variable in order to represent realtime what the user is currently drawing. The Drawing struct is just a simple type that contains an array of CGPoints.
struct Drawing {
    var points: [CGPoint] = [CGPoint]()
}
The drawings array contains all the drawings the user has added so far. A drawing is created when the user has started dragging on the pad and added to the array when the user has finished with the gesture.
The color @State variable, as its name implies, holds the current selected color for the drawings. The lineWidth variable determines the width of the drawing pencil.
Now, let’s examine what we are passing to the DrawingPad as a binding. The currentDrawing and drawings are passed since the drawing pad is the place where this state will change. The user will draw on the pad and based on this, these two bindings will be updated. The color and width are not going to be changed in the pad, but the view depends on these states in order to correctly display the drawing. So these values will not change in the pad, but every change of these states in other places (DrawingControls view), needs to be reflected in the drawing pad.
The DrawingControls view on the other hand, has bindings for color, lineWidth and drawings. As we mentioned above, the bindings for color and lineWidth are pretty clear – these states are updated here. The drawings array is needed because of the undo and clear functionalities. This means that the drawings state can be altered from both of the views.
Next, let’s see the DrawingPad.
     var body: some View {
        GeometryReader { geometry in
            Path { path in
                for drawing in self.drawings {
                    self.add(drawing: drawing, toPath: &path)
                }
                self.add(drawing: self.currentDrawing, toPath: &path)
            }
            .stroke(self.color, lineWidth: self.lineWidth)
                .background(Color(white: 0.95))
                .gesture(
                    DragGesture(minimumDistance: 0.1)
                        .onChanged({ (value) in
                            let currentPoint = value.location
                            if currentPoint.y >= 0
                                && currentPoint.y < geometry.size.height {
                                self.currentDrawing.points.append(currentPoint)
                            }
                        })
                        .onEnded({ (value) in
                            self.drawings.append(self.currentDrawing)
                            self.currentDrawing = Drawing()
                        })
            )
        }
        .frame(maxHeight: .infinity)
    }
Let's start from the bottom. The drawing will be done with a DragGesture, with a minimum distance of 0.1. That's the distance in points from where the detection should start. The dragGesture has two callbacks, onChanged and onEnded.
The onChanged method is called whenever there's an update of the dragging state. In this method, we are taking the current location of the event and we are checking if it's in the bounds of the drawing pad. Detecting the start of the pad is pretty straightforward, we are just checking if the point's Y value is bigger than zero. But how do we get the size of the drawing pad?
Enter the GeometryReader. This view returns a flexible preferred size to its parent layout. Or in simpler words, it tells the parent view (the container view in our case), what size it should be. It also provides access to the geometry of the view, which contains its size. To better understand how this works, please have a look at the amazing WWDC session Building Custom Views with Swift UI. Going back to our gesture, we will use the size of the geometry to get the height of the view and we will limit the points added to the drawing to that height.
The onEnded method is called when the dragging ends. In this method, we are adding the finished drawing to our list of drawings and we clear out the currentDrawing.
We have seen how to collect the drawings with a dragging gesture. Next, let’s see how we can display them, by looking at the Path component. It’s similar to UIBezierPath from UIKit. Basically, we provide points to the path and we draw different shapes with those points (lines, curves, rectangles etc). In our case, we want to draw lines between two points (starting and current point of dragging).
As we have seen above, all variables are passed from the parent view as @Binding, which means every update in this view will automatically be reflected in the parent view and other views that are depending on that state.
Next, let’s have a look at the DrawingControls view.
    var body: some View {
        NavigationView {
            VStack {
                HStack(spacing: spacing) {
                    Button("Pick color") {
                        self.colorPickerShown = true
                    }
                    Button("Undo") {
                        if self.drawings.count > 0 {
                            self.drawings.removeLast()
                        }
                    }
                    Button("Clear") {
                        self.drawings = [Drawing]()
                    }
                }
                HStack {
                    Text("Pencil width")
                        .padding()
                    Slider(value: $lineWidth, from: 1.0, through: 15.0, by: 1.0)
                        .padding()
                }
            }

        }
        .frame(height: 200)
        .sheet(isPresented: $colorPickerShown, onDismiss: {
            self.colorPickerShown = false
        }, content: { () -> ColorPicker in
            ColorPicker(color: self.$color, colorPickerShown: self.$colorPickerShown)
        })
    }
At the root of this view we have a NavigationView, because we will need to present the color selection sheet. Next, we have a vertical stack, that consists of a horizontal stack of three buttons (Pick color, Undo and Clear) and another horizontal stack that has a text and a slider for the selection of the pencil width.
One interesting thing here is the presentation of a view controller. First, we need to define a new @State boolean variable, colorPickerShown, which determines whether the picker should be shown. We set this variable to true on the click of the “Pick color” button. Next, we add a .sheet() modifier to the navigation view, which expects a boolean for its isPresented state. We pass the colorPickerShown here. On dismiss of this sheet, we set the colorPickerShown value to false. In the content callback, we provide a ColorPicker view, which has two bindings, for the color and for the colorPickerShown state.
The color picker contains a list of colors retrieved from a ColorsProvider. Whenever an entry of the list is tapped, that color is selected in the drawing controls and the modal screen is dismissed.
struct ColorPicker: View {
    @Binding var color: Color
    @Binding var colorPickerShown: Bool

    private let colors = ColorsProvider.supportedColors()

    var body: some View {
        List(colors) { colorInfo in
            ColorEntry(colorInfo: colorInfo).tapAction {
                self.color = colorInfo.color
                self.colorPickerShown = false
            }
        }
    }
}
To represent a color entry, we have a new view, which consists of a circle filled with the appropriate color and its display name.
struct ColorEntry: View {
    let colorInfo: ColorInfo

    var body: some View {
        HStack {
            Circle()
                .fill(colorInfo.color)
                .frame(width: 40, height: 40)
                .padding(.all)
            Text(colorInfo.displayName)
        }
    }
}
That’s everything that needs to be done in order to have a basic drawing app in SwiftUI.
Conclusion
This sample project is a good exercise on understanding how to model state in SwiftUI. The benefits of using this declarative approach are that we can hardly have inconsistent state. We don’t have to worry about calling update functions whenever something has changed. We just setup the appropriate bindings and let SwiftUI take care of the rest.
The complete source code project can be found here.

I see you don’t monetize martinmitrevski.com, don’t waste your traffic, you can earn additional cash every month
with new monetization method. This is the best adsense alternative for any type
of website (they approve all websites), for more info simply search in gooogle: murgrabia’s tools
LikeLike
hello
I’m very very thank you for your drawingpad tutorial.
I’m newbie in swiftui.
Can i ask something little question?
When i finished drawing, how can i save drawing to UIImage.
How can convert drawing image to UIImage?
thank you very much
LikeLike
Hi,
If you want to use the approach described in this article, you would have to create an image from the SwiftUI view in a way described here: https://stackoverflow.com/questions/57200521/how-to-convert-a-view-not-uiview-to-an-image.
If you want to use PencilKit, there’s a direct method to take image from a drawing.
Hope this helps.
LikeLike
Thank you very very very much!!!! Have a good day~~^^
LikeLike
Hi there, I was wondering if you tested this already in iOS 14?
I am making an app with similar functionality and I keep getting the error. I get it also with your project, it’s killing that I can’t figure out the cause, might just be a bug from Apple but was wondering if you had any input.
Cheers 🙂
ps: on some device I get it more often, on Beta 3 it wasn’t happening I think
Terminating app due to uncaught exception ‘CALayerInvalidGeometry’, reason: ‘CALayer position contains NaN: [nan nan]. Layer: <_TtC7SwiftUIP33_F176A6CF4451B27508D54E2BEAEBFD5415ColorShapeLayer:0x600001f1fc00; position = CGPoint (0 0); bounds = CGRect (0 0; 0 0); delegate = <_TtC7SwiftUIP33_A34643117F00277B93DEBAB70EC0697122_UIShapeHitTestingView: 0x7fe93ba07bc0; frame = (0 0; 0 0); anchorPoint = (0, 0); autoresizesSubviews = NO; layer = >; allowsEdgeAntialiasing = YES; allowsGroupOpacity = YES; anchorPoint = CGPoint (0 0); lineDashPattern = (
); lineWidth = 3; strokeColor = [ (kCGColorSpaceICCBased; kCGColorSpaceModelRGB; sRGB IEC61966-2.1; extended range)] ( 0 0 0 1 ); fillColor = [ (kCGColorSpaceICCBased; kCGColorSpaceModelRGB; sRGB IEC61966-2.1; extended range)] ( 0 0 0 0 ); path = >’
terminating with uncaught exception of type NSException
CoreSimulator 732.13 – Device: iPhone 8 (14A5AC85-61B7-414B-A5D9-7118D1079B64) – Runtime: iOS 14.0 (18A5351d) – DeviceType: iPhone 8
LikeLike
Hi Nuno,
There were some build errors for me on Xcode 12 Beta 3. I’ve fixed those and pushed them to the repo, you can check if it works for you as well.
I haven’t still installed the latest beta yet, will do it in the following period.
Apart from those changes, the app seems to be working on iOS 14. If there’s a weird error like the one you’ve listed, probably it’s something with Apple.
Let’s see if it happens in the GM version.
Best,
Martin
LikeLike
Thank you very much! I’ve just one question. I was wondering about why the curves are a bit jagged and if there’s a solution for this?
LikeLike
Using this approach with gestures has limitations and it is indeed a bit jagged. If you want to have production quality drawing, I would recommend using PencilKit (and potentially wrap it in SwiftUI). More details about PencilKit in my other post -> https://martinmitrevski.com/2019/11/10/getting-started-with-pencilkit-on-ios-13/. Hope this helps!
LikeLike
Change the stroke parameters by adding StrokeStyle in the code to get a smoother line without jagged curves:
From: .stroke(self.color, lineWidth: self.lineWidth)
To: .stroke(self.color, style: StrokeStyle(lineWidth: self.lineWidth, lineCap: .round, lineJoin: .round))
LikeLike
Hi, I am working on a drawing app and I used this tutorial to get the basics working. How can I change it so that changing the color or stroke size only effects the new drawing and not the old ones as well? I want to be able to have strokes of multiple sizes and colors on the screen at once. Thanks!
LikeLike
Hi, you can do it by adding the color and line width for every Drawing separately (extending the struct). Then, you would need to group all the drawings by color / line width, and have separate Paths in the SwiftUI view. Afterwards, the stroke color / line width would be dynamically used from each drawing group. Hope this helps.
LikeLike
The cleanliness of this code makes me smile. Thank you for providing such a great example to learn from, I appreciate it!
LikeLiked by 1 person
Hey Nice article….
What if i want each DrawingPath to use different Stroke Color & LineWidth?
In your example, if i change color or width, it changes for all the previous drawings.
I just want to change color & write a new path with the recent changed color.
Please let me know how to do that???
LikeLike
Hi Jai,
you can do this by storing the color in the Drawing struct, and saving it for all drawings separately. Additionally, I think you would have to create a ForEach with different Paths (based on color), and use a different stroke for each of them.
Hope this helps.
Martin
LikeLike